Understanding the right way to evacuate a car's AC system is beneficial
because it helps ensure the air conditioning system is in good working
condition and can perform at optimal levels when needed.
However, many drivers avoid doing this job themselves because they worry
they will do something wrong. Knowing what to do and referring to the
owner's manual when necessary will simplify the process.
To evacuate your car's air conditioning system, you must gather the
necessary tools, set up your recovery tank, and connect the vacuum pump.
Once connected, you can empty your recovery tank, use the manifold gauges,
hook up your hoses, and get rid of any air and moisture present in your
unit.
Are you ready to learn the right steps for evacuating your car's AC system?
If so, find a comprehensive, step-by-step guide here.
 A mechanic servicing an AC compressor in a car.
How Do I Evacuate My Car Air Conditioning System Myself?
Here are the steps involved with evacuating your car's air conditioner
system.
Remember, this isn't common knowledge for most people, so having a guide
like this can be extremely beneficial.
Many have found that the potential for mistakes is significantly reduced
when using a guide.
1) Gather the Needed Tools
When working on your car, use the proper protective gear, including thick
gloves and protective glasses.
You will also need a few other tools for this job. These include:
-
Manifold Gauges
-
Vacuum Pump
-
AC recovery machine
-
Recovery tank
Once you have your tools and equipment collected, you can get started. It
is always best to get your tools together before you start to avoid having
to stop in the middle of the process.
2) Setup Recovery Tank
You need to get the recovery tank ready to do its job. To do this, open the
valves on the tank, which releases the nitrogen inside.
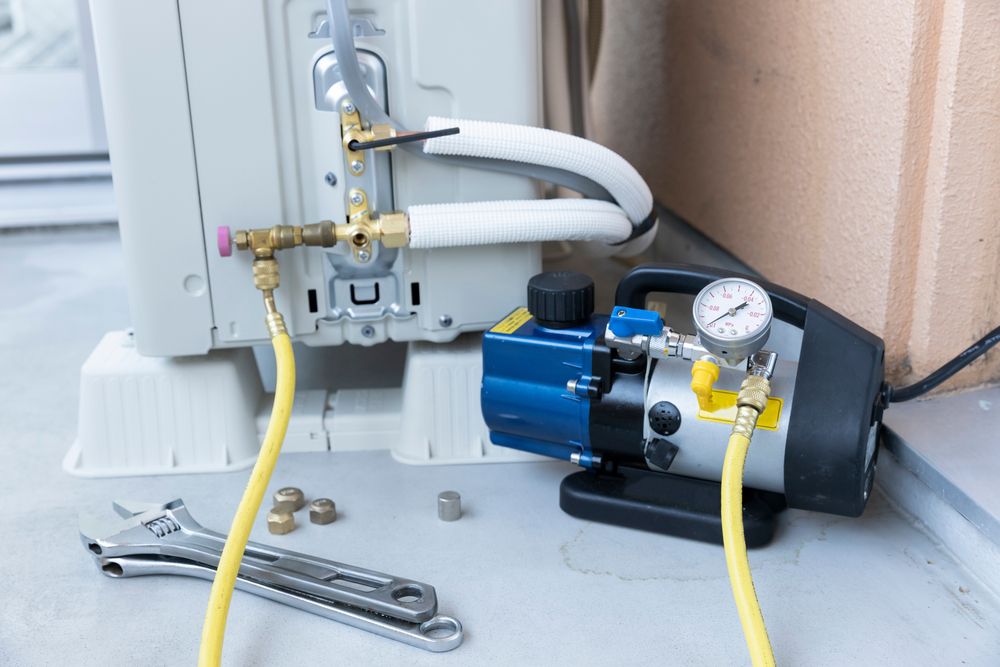 A vacuum pump hooked up to a home AC unit.
3) Connect the Vacuum Pump
It's possible to remove air and moisture from inside the recovery tank by
attaching the vacuum pump to the blue valve.
This equipment is expensive, and it may not make sense for you to purchase
it outright. If this is the case, you can rent it from most auto parts
stores.
As you connect the vacuum pump, keep the recovery tank valves closed.
After connecting the pump, move the blue valve to the open position and
switch the pump on.
Leave the vacuum pump running for one hour (approximately) to ensure all
the air and moisture are evacuated from the recovery tank.
4) Empty Everything Out of the Recovery Tank
To empty the recovery tank, start by closing the valve on it and the vacuum
pump.
Once the valves are in the closed positions, be sure to follow the next
steps carefully.
Deviating from the order given may result in oil being sucked out of the
vacuum pump and getting into the recovery tank due to the vacuum that's
created.
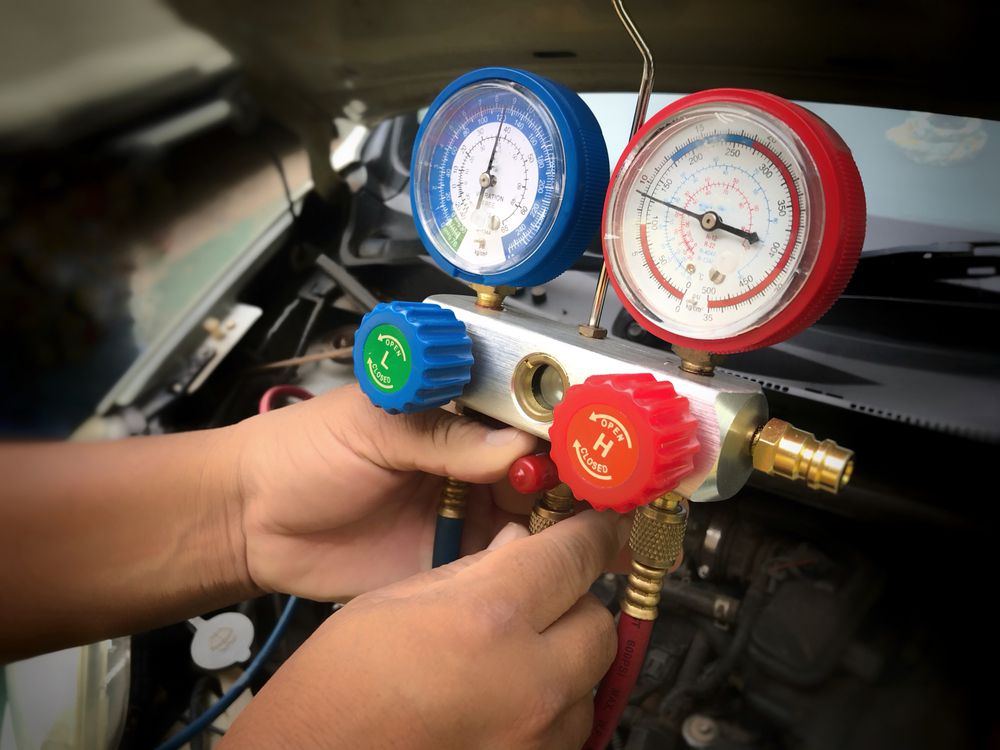
5) Grab Your Manifold Gauges
Now it's time to use the manifold gauges. Be sure they are closed before
connecting them to your car.
Familiarize yourself with what side is used for high pressure and low
pressure to avoid mistakes.
When looking under the hood of your car, the low pressure service port is
found on the return line between the air conditioning compressor and
evaporator/firewall.
The high-pressure service port is between the expansion valve/orifice tube
and the condenser.
The high-pressure side will then be connected to the red manifold
connector, which leaves the low pressure port connected to the blue
manifold connector.
The fittings on the connectors differ, so there is no concern about size
compatibility. Also, for extra help, they are color-coded.
 AC manifold gauges.
6) Connect Hoses to Recovery Unit
The yellow manifold connector should be hooked up to the corresponding
service port on your AC recovery machine or unit that reads "in."
You will need another yellow connector to hook up to the end of the
recovery unit service port that reads "out," and the other end should
connect to the recovery tank's blue-colored valve.
7) Eliminate Moisture and Air in Your Car's AC System
When everything is hooked up based on the instructions above (and in that
order), open the blue-colored valve on your recovery tank.
As you open the valve, watch for any leaks. Remember, your car's AC is a
closed system, so leaks should be noticeable.
After that, open the blue liquid valve on the gauges. Doing this removes
any liquid in your car's AC system.
The next step is to open the red vapor valve, and when this is done, the
process of evacuating the car's AC system is finished.
It's necessary to leave the evacuation process running for 30 to 45 minutes
or until the manifold gauges reach zero.
Having a readout under zero is even better since it means the system will
hold a vacuum and confirms there aren't any leaks in your AC system.
For additional confirmation that your AC is leak free, leave the gauges
connected for about 30 minutes to an hour after the pressure lines are
closed. If the readout remains the same, it means the system is good.
The average vacuum pump will only achieve about 20" to 25" HG rather than
the "perfect" vacuum of 29.6" Hg.
Depending on what type of vacuum pump you use to evacuate your AC system,
the time it takes may be slightly longer than what is mentioned above. It
may take more than an hour if you are in an area with elevated humidity
levels.
You should research what vacuum pump will help you achieve the best values.
This is especially important if you plan to purchase one.
However, if you plan to rent the equipment, you can rely on where the
needles point on the manifold gauges.
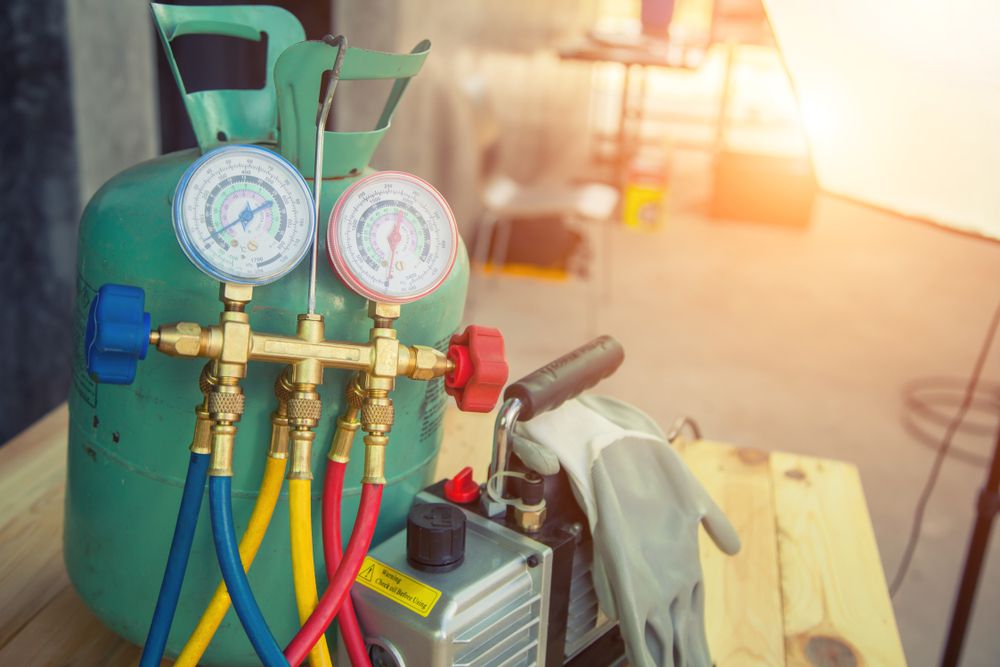
 Mechanic with AC servicing machine.
8) Remove the Manifold Gauges
When you reach zero on the gauges, close the vapor and liquid valves.
Ensure the inlet and outlet valves are also closed on the recovery unit.
After this, the recovery unit can be shut off.
9) Close Open Valves
Before disconnecting the connectors and lines, close the blue valve on the
recovery tank. Be sure to remove these the same way you connected them.
The first disconnection is the lines in your vehicle and those attached to
the recovery unit. The yellow line is the last one to disconnect, which
runs from your AC recovery unit to the recovery tank.
10) Reattach the Port Covers
The last step is to replace the dust caps. These go over the high- and
low-pressure lines found under the hood.
How To Evacuate and Recharge Car AC System?
Despite what you may have heard, purging or evacuating your AC system isn't
that complicated. While having some mechanical knowledge can be helpful, it
is not required.
Getting the needed tools and following the steps carefully are two of the
hardest steps in this process.
It is important to note that evacuating your vehicle's AC system (which
eliminates moisture and air buildup) differs from removing the liquid
refrigerant from your cooling system.
If this is necessary, take your car to the professionals. They can remove
and recharge the refrigerant in your car's AC system.
 Portable home AC service machine.
Can You Evacuate Car Air Conditioning Without Pump?
A vacuum pump is the preferred option for handling AC evacuation. While
this is true, it's not the only method that will work. To evacuate the
car's AC without a pump, use this process:
1) Depress the Access Valves for Your AC
You must install access valves on the low- and high side of the compressor
to ensure proper operation. After installing these, close the high-side
access valve and set the compressor pressure on the low side.
Pressure will build up and reach a point that closes the high-side valve.
When this happens, the compressor will shut down.
2) Charge Your Low-Side Valve
Adjust the low-pressure side of your air conditioner system to a setting of
14 psi. If you run the friction for several minutes, you will get the high
and low sides as close to balanced as possible for your car air conditioner
system.
3) Disengage the Pressure from the High-Side Valve
Remove the pressure from the service valve and push it against the high
valve, which creates the desired outcome.
Close your high valve and compressor until the low side reaches the proper
operating pressure.
4) Repeat Steps Two and Three
Adjust the pressure to 14 psi for three minutes to equalize the machine's
pressure. This requires you to repeat steps two and three over and over.
Once you have done this, you can turn the compressor back on by depressing
the valve on the high-pressure side. Close it when no residual moisture,
air, or vapor is expelled from the high-maintenance valve.
Follow the Process Carefully
Like with the method of using a pump to evacuate the remaining air and
moisture from your AC system, be sure to follow the steps carefully.
The entire process will be easier when you follow the steps. Remember, if
you notice a significant amount of air or moisture, you may need to invest
in this service more often.
Again, if you aren't comfortable handling the process yourself, you can use
professional services, like Jiffy Lube, to handle it for you.
What is the Cost of Evacuating a Car AC System?
The cost of evacuating your car air conditioning system depends on whether
you do it yourself or hire professionals.
For example, to evacuate and recharge your vehicle, you can expect to pay
between $119 and $280.
Do You Have to Evacuate a Car AC System to Change Compressor?
All the refrigerant must be evacuated first to replace your air
conditioning system compressor. Once this is done, removing the lines and
taking the old compressor out is easy.
Be sure to replace it with a good compressor.
Conclusion
If you plan to evacuate your car's air conditioner yourself, it's important
to follow the steps - as listed - above.
This will ensure the process is done properly and that you don't cause
damage to the air conditioning system in your car.
Investing in routine maintenance like this can reduce your issues and
ensure your air conditioner works properly when needed.